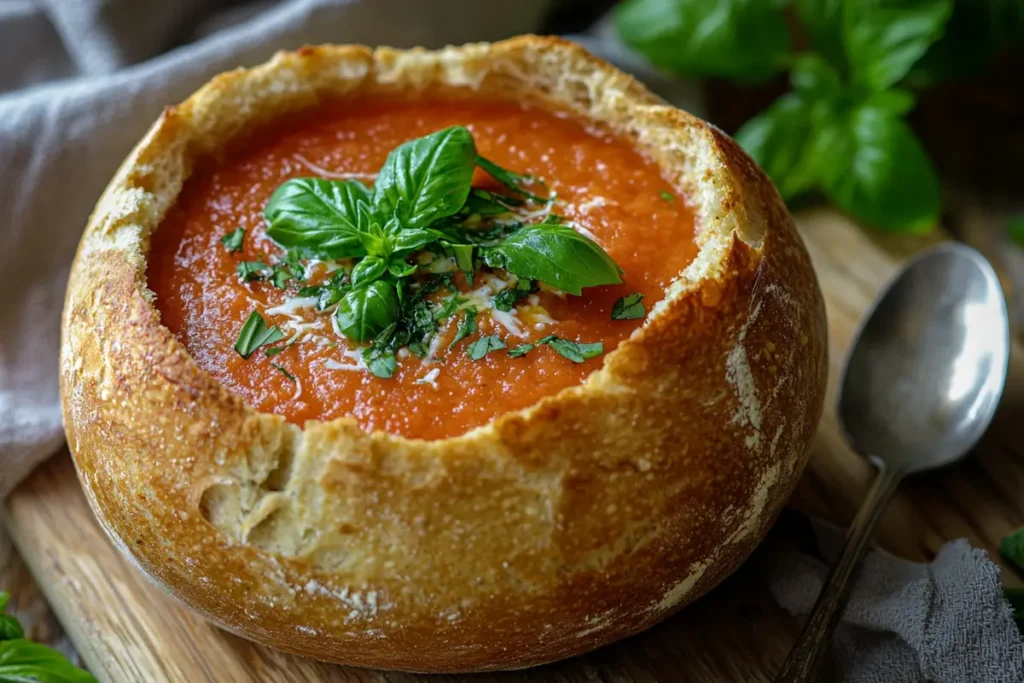
A sourdough bread bowl is the perfect blend of flavor, creativity, and practicality. These rustic, edible vessels are made from tangy sourdough bread, naturally fermented for a rich and distinctive taste. Whether you’re serving soups, stews, or dips, sourdough bread bowls add a delightful charm to every meal, making them as functional as they are delicious.
This guide will take you through everything you need to know about sourdough bread bowls—from their origins and health benefits to step-by-step instructions for making them at home. We’ll also explore creative serving suggestions and answer the most common questions about these versatile bowls. By the end, you’ll be ready to create your very own sourdough bread bowls and enjoy their irresistible appeal.
Table of Contents
What is a Sourdough Bread Bowl?
Defining the Sourdough Bread Bowl
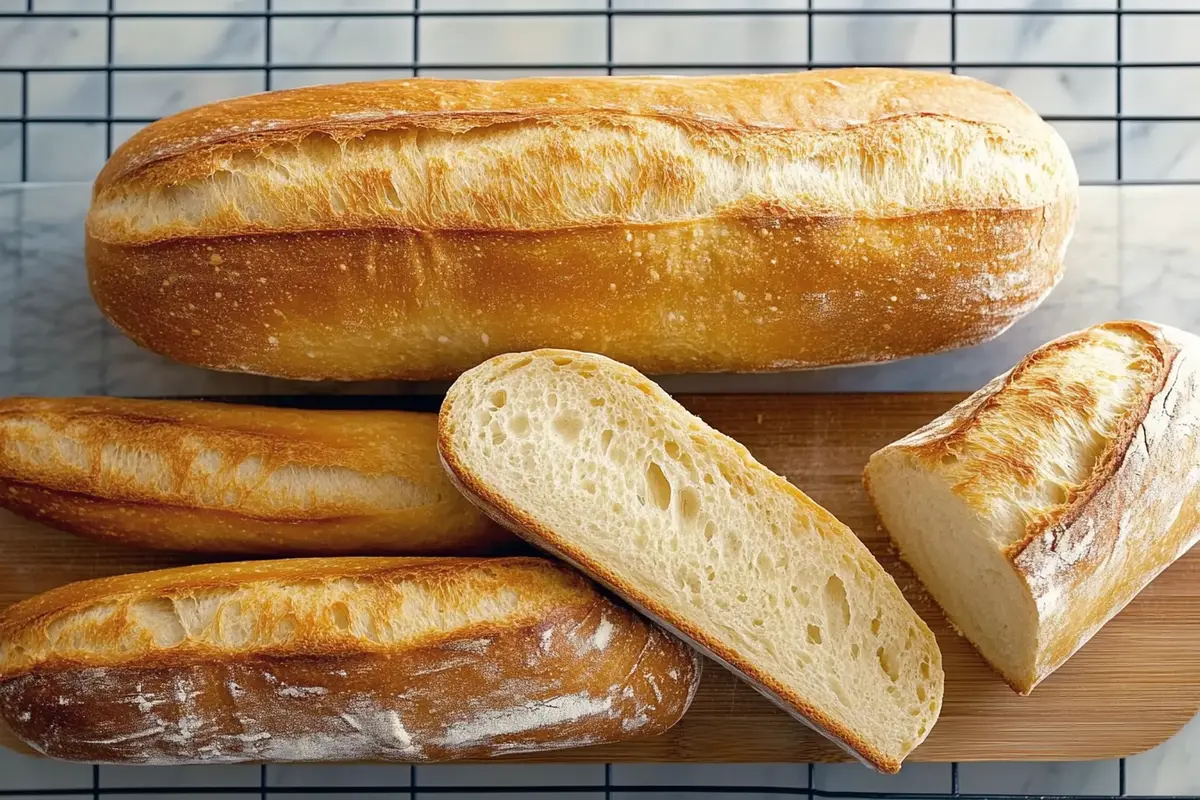
A sourdough bread bowl is more than just a round loaf of bread. It’s an edible vessel, hollowed out to hold hearty soups, stews, and dips. Its tangy, robust flavor comes from the natural fermentation of dough, a process that creates the signature sourdough taste. The crispy crust and tender crumb make it ideal for containing liquids without becoming a soggy mess.
A Brief History of Sourdough Bread Bowls
Sourdough itself has a rich history, tracing back thousands of years. Ancient cultures relied on natural fermentation to leaven bread, and the technique has stood the test of time. The modern-day bread bowl concept likely evolved from medieval trenchers—stale bread used as plates. While the precise origins of the sourdough bread bowl remain unclear, its contemporary popularity exploded in San Francisco, a city renowned for its sourdough tradition.
San Francisco’s foggy climate provides the perfect conditions for cultivating lactobacillus, the bacteria responsible for the bread’s tangy flavor. Local bakeries began experimenting with sourdough in creative ways, and the bread bowl became an instant hit for serving clam chowder—a pairing that’s become iconic in the region.
Why Sourdough Bread Bowls are Special
What sets sourdough bread bowls apart from their counterparts is their unique combination of durability and taste. Unlike regular bread, sourdough has a thicker crust that holds up against liquids, preventing sogginess. Additionally, the natural fermentation process enhances digestibility and delivers a complex flavor profile that pairs wonderfully with savory fillings.
Understanding Sourdough Bread
What is Sourdough?
At its core, sourdough is bread born from tradition, science, and a bit of culinary magic. Instead of relying on commercial yeast, sourdough uses a natural fermentation process involving lactobacilli and wild yeast. This harmonious duo thrives in a mixture of flour and water, creating what’s known as a sourdough starter—a living culture that forms the heart of every loaf.
What sets sourdough apart is its depth of flavor. The fermentation process produces a tangy, slightly sour taste that enhances every bite. This bread also boasts a hearty texture, with a chewy crumb and a crisp crust that has become synonymous with artisanal baking.
Another reason sourdough is beloved is its resilience. The natural acidity from fermentation acts as a preservative, extending its shelf life without the need for additives. This makes it a favorite among those seeking both flavor and sustainability.
Health Benefits
Beyond its incredible taste, sourdough bread offers a variety of health benefits, making it a smarter choice than many commercially produced breads.
First, the fermentation process partially breaks down gluten, making sourdough easier to digest—especially for those with mild sensitivities. While it’s not gluten-free, the natural fermentation reduces some of the strain on the digestive system.
Next, sourdough boasts a lower glycemic index compared to regular bread, meaning it has a gentler impact on blood sugar levels. This makes it a better option for individuals managing diabetes or aiming to maintain steady energy throughout the day.
Additionally, sourdough is a nutritional powerhouse. The fermentation process enhances the bioavailability of minerals like magnesium, zinc, and iron while also increasing antioxidants. These nutrients support immune function, reduce inflammation, and promote overall wellness.
Finally, sourdough’s long fermentation can improve gut health. The lactobacilli in sourdough act as probiotics, contributing to a balanced gut microbiome. With benefits like these, it’s easy to see why sourdough is more than just bread—it’s a functional food.
Making Sourdough Bread Bowls at Home
Ingredients Needed
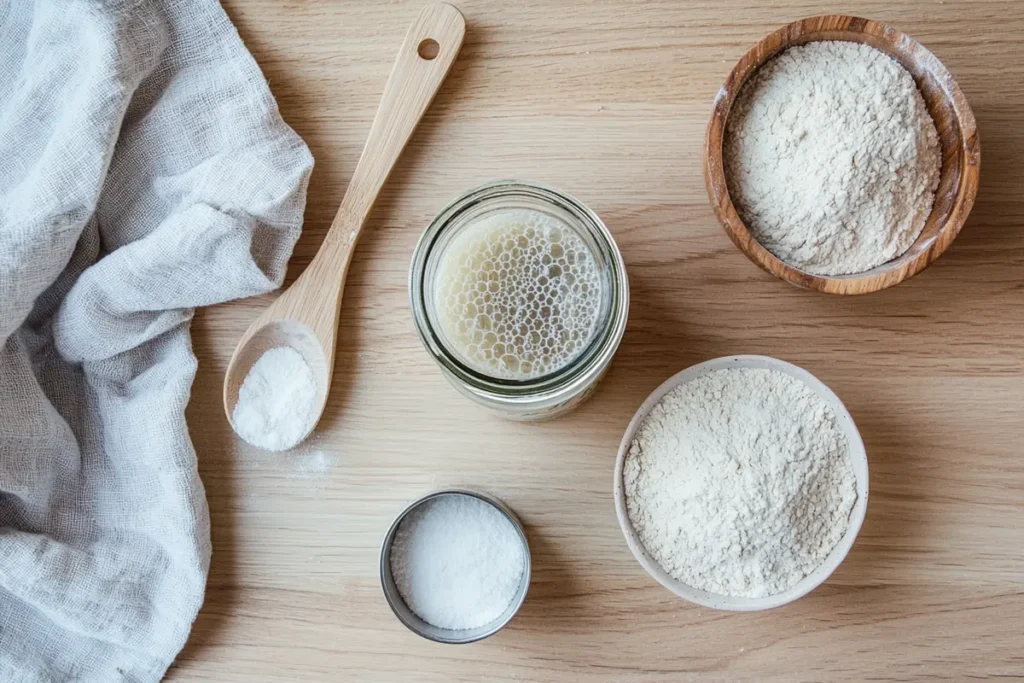
To create the perfect sourdough bread bowl, you’ll need a handful of simple, wholesome ingredients that work together to create the magic of sourdough:
- Active sourdough starter: The heart of your bread, providing natural leavening and signature tanginess.
- All-purpose flour: For structure and elasticity in the dough.
- Whole wheat flour: Adds depth of flavor and nutritional value.
- Water: Essential for hydrating the dough and activating the starter.
- Salt: Enhances flavor and strengthens the dough’s gluten structure.
Step-by-Step Recipe
1. Prepare the Dough
In a large mixing bowl, combine all-purpose flour, whole wheat flour, water, and your active sourdough starter. Mix until no dry flour remains, then let the mixture rest for 30 minutes in a process called autolyse. This allows the gluten to start forming, making the dough easier to handle.
2. Mixing
After the autolyse, add salt to the dough. Mix it thoroughly, either by hand or with a stand mixer, until it becomes smooth and elastic. If mixing by hand, use a stretch-and-fold technique to incorporate the salt evenly.
3. First Rise
Transfer the dough to a lightly oiled bowl and cover it with a damp cloth. Allow it to rise at room temperature until it doubles in size—this usually takes 4 to 6 hours, depending on the activity of your starter.
4. Shaping
Once the dough has risen, gently deflate it and divide it into equal portions. Shape each portion into a round loaf by tucking the edges underneath, creating surface tension on the top.
5. Proofing
Place the shaped loaves on parchment paper or in proofing baskets, cover, and let them proof for 2 to 4 hours. The loaves should appear puffy and slightly jiggle when shaken.
6. Baking
Preheat your oven to 450°F (230°C) with a Dutch oven inside to heat up. Score the tops of the loaves with a sharp knife or razor blade, then transfer them to the Dutch oven. Bake with the lid on for 20 minutes, then remove the lid and bake for an additional 15-20 minutes until the crust is golden brown.
7. Hollowing
After the bread cools completely, use a serrated knife to cut off the top. Gently hollow out the interior, leaving enough thickness to hold your filling. Reserve the removed bread for croutons or breadcrumbs.
Tips
- Keep Your Starter Active: Feed your sourdough starter regularly to maintain its activity and flavor. A sluggish starter will lead to dense bread.
- Allow Adequate Fermentation: Don’t rush the rise! Proper fermentation develops the sourdough’s tangy flavor and airy texture.
- Bake in a Dutch Oven: Using a Dutch oven traps steam, ensuring a crisp crust and a soft, tender interior.
Serving Suggestions
Best Soups and Stews
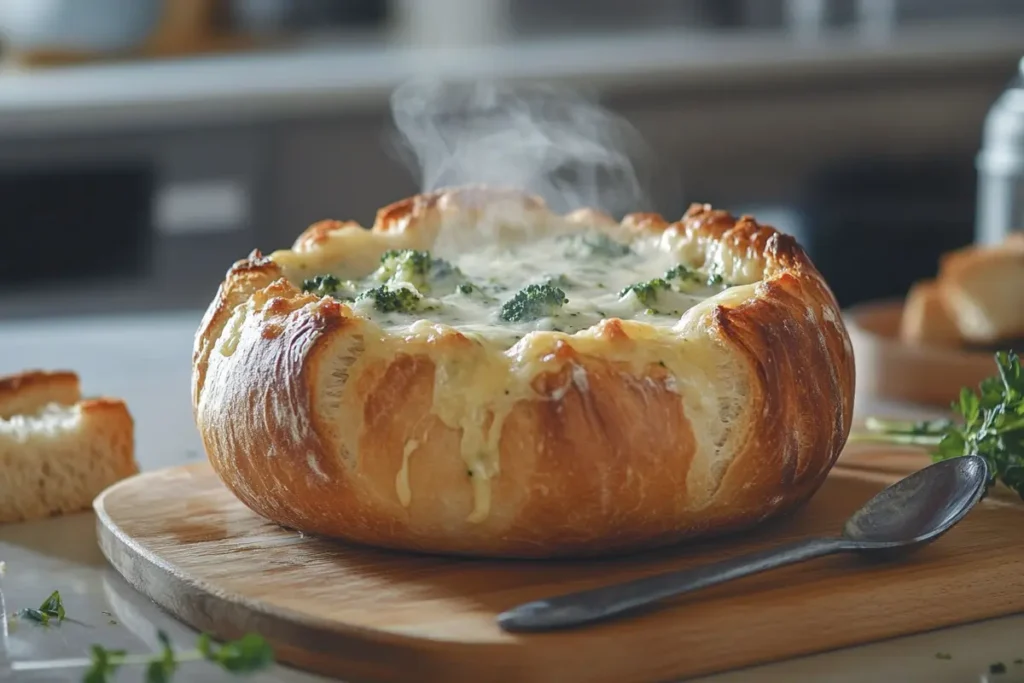
A sourdough bread bowl is a natural companion to hearty soups and stews, elevating even the simplest recipes into a cozy, satisfying meal. The sturdy crust holds up beautifully against hot, creamy, or chunky fillings, while the tangy flavor complements savory dishes. Here are some of the best options to ladle into your bread bowl:
- Clam Chowder: This classic pairing is a match made in culinary heaven. The creamy, briny flavors of clam chowder contrast wonderfully with the tangy crust of sourdough.
- Broccoli Cheddar Soup: Comfort food at its finest! The rich, cheesy texture of broccoli cheddar soup transforms your bread bowl into a cheesy, edible delight.
- Beef Stew: Thick and hearty, beef stew fills your bread bowl with a savory punch. The tender chunks of beef and vegetables soak up the sourdough’s flavor for a truly robust experience.
- Creamy Tomato Basil Soup: A timeless choice, tomato basil soup brings a smooth, tangy touch that pairs seamlessly with the sour notes of the bread.
Creative Uses Beyond Soups
While soups and stews might be the first thing that comes to mind, sourdough bread bowls are far more versatile than they seem. Here are some innovative ways to use them:
- Spinach and Artichoke Dip: Serve this creamy, cheesy dip in a hollowed-out sourdough bread bowl for a party-ready appetizer. The sturdy crust doubles as a dipping tool!
- Chili con Carne: Give your chili an extra kick by serving it in a bread bowl. The bold spices of chili pair wonderfully with the tangy undertones of sourdough.
- Salads for a Unique Presentation: Add a touch of whimsy to your meal by presenting fresh, vibrant salads in sourdough bread bowls. Whether it’s Caesar, Greek, or a mixed green salad, this creative approach will impress any guest.
Frequently Asked Questions
How do I keep the bread bowl from getting soggy?
To prevent your sourdough bread bowl from becoming soggy, consider brushing the interior with a thin layer of olive oil or melted butter. Then, bake the hollowed-out bowl for about 5–10 minutes at 350°F (175°C) to create a slightly crisp, moisture-resistant barrier. This small step helps preserve the bread’s structure, even when filled with piping hot soup or creamy dips.
What is the best bowl for sourdough bread?
When crafting sourdough bread, the term “bowl” often refers to proofing baskets or bannetons. These are typically made from wicker or plastic and are used to support the dough during its final rise. For baking, many bakers swear by using a Dutch oven, which traps steam and helps achieve that signature sourdough crust.
What is a sourdough bread bowl called?
There isn’t a specialized term beyond “bread bowl,” but the type of bread used—sourdough—adds a distinctive touch. You’ll often hear it referred to simply as a “sourdough bread bowl.” It’s renowned for its durability and tangy flavor, making it a popular choice for serving soups and stews.
Do you need a special bowl for sourdough bread?
Not necessarily. While proofing baskets are helpful for shaping and supporting the dough, they’re not a requirement. You can use a mixing bowl lined with a floured kitchen towel as an alternative. However, a Dutch oven is highly recommended for baking as it replicates the environment of a professional bread oven, trapping steam to produce a perfectly crisp crust.
Is sourdough bread suitable for people with gluten sensitivities?
Sourdough bread may be easier to digest for those with mild gluten sensitivities due to its long fermentation process, which partially breaks down gluten. However, it’s important to note that sourdough is not gluten-free, and individuals with celiac disease or severe gluten intolerance should avoid it. Always consult with a healthcare professional if you’re unsure.
Are Panera bread bowls sourdough?
Yes, Panera Bread’s bread bowls are traditionally made using sourdough. This choice enhances the flavor and provides the sturdy, chewy texture needed to hold hot soups without falling apart. Their iconic sourdough bread bowls have become a fan favorite for dishes like broccoli cheddar soup and clam chowder.
Print
How to Make the Perfect Sourdough Bread Bowl at Home
- Total Time: 9–11 hours (including fermentation)
- Yield: 2 medium sourdough bread bowls
- Diet: Vegetarian
Ingredients
For the Dough
- 1 cup (240g) active sourdough starter (fed and bubbly)
- 3 cups (360g) all-purpose flour
- 1 cup (120g) whole wheat flour
- 1 1/4 cups (300ml) warm water (room temperature)
- 2 tsp (10g) salt
Optional for Hollowing and Baking the Bowl
- 1 tbsp olive oil (for brushing the interior)
Instructions
1. Prepare Your Starter
Make sure your sourdough starter is active, bubbly, and fed. This ensures your bread has the strength to rise and develop its signature tangy flavor.
2. Mix the Dough
- In a large mixing bowl, combine the all-purpose flour, whole wheat flour, and warm water. Stir until no dry flour remains.
- Add the sourdough starter and mix until combined. Cover the bowl with a damp towel and let it rest for 30 minutes (autolyse step).
3. Add Salt and Mix
Sprinkle the salt over the dough and knead it by hand or in a stand mixer for 5–7 minutes. Use the stretch-and-fold technique if mixing by hand: grab one edge of the dough, stretch it up, and fold it over. Rotate the bowl and repeat 4–6 times.
4. Bulk Fermentation (First Rise)
- Transfer the dough to a lightly oiled bowl. Cover with a damp cloth or plastic wrap.
- Let the dough rise at room temperature for 4–6 hours, until it doubles in size. If your kitchen is cool, this might take longer.
5. Shaping the Dough
- Gently deflate the dough and divide it into two equal portions. Shape each portion into a round loaf by folding the edges underneath to create tension on the surface.
- Place the shaped loaves onto a parchment-lined baking sheet or into floured proofing baskets.
6. Proofing (Final Rise)
- Cover the loaves with a damp cloth or plastic wrap and let them proof for 2–4 hours until they are puffy and slightly spring back when touched.
7. Preheat and Bake
- Preheat your oven to 450°F (230°C). If you’re using a Dutch oven, place it inside the oven to preheat.
- Score the tops of the loaves with a sharp knife or bread lame. Transfer the loaves to the Dutch oven (or directly to a baking sheet).
- Bake with the lid on (if using a Dutch oven) for 20 minutes, then remove the lid and bake for an additional 15–20 minutes until the crust is golden brown and crisp.
8. Hollowing Out the Bread Bowl
- Allow the loaves to cool completely before hollowing them out.
- Cut off the top of each loaf with a serrated knife. Using your hands, gently pull out the interior bread, leaving a 1-inch thick shell to hold the filling. Reserve the scooped bread for croutons or breadcrumbs.
Notes
- Brush the inside of the hollowed bread bowl with olive oil.
- Place it in the oven at 350°F (175°C) for 5–10 minutes to lightly toast the interior, creating a barrier to prevent it from getting soggy.
- Prep Time: 30 minutes (plus 8–10 hours for fermentation and proofing)
- Cook Time: 40 minutes
- Category: Bread
- Method: Baking
- Cuisine: American/Artisan